Creating Custom Fields
Now that our data was processed and the investigations page is open to you, let’s build new fields derived from our data.
Step 1. Edit an existing field - "city".
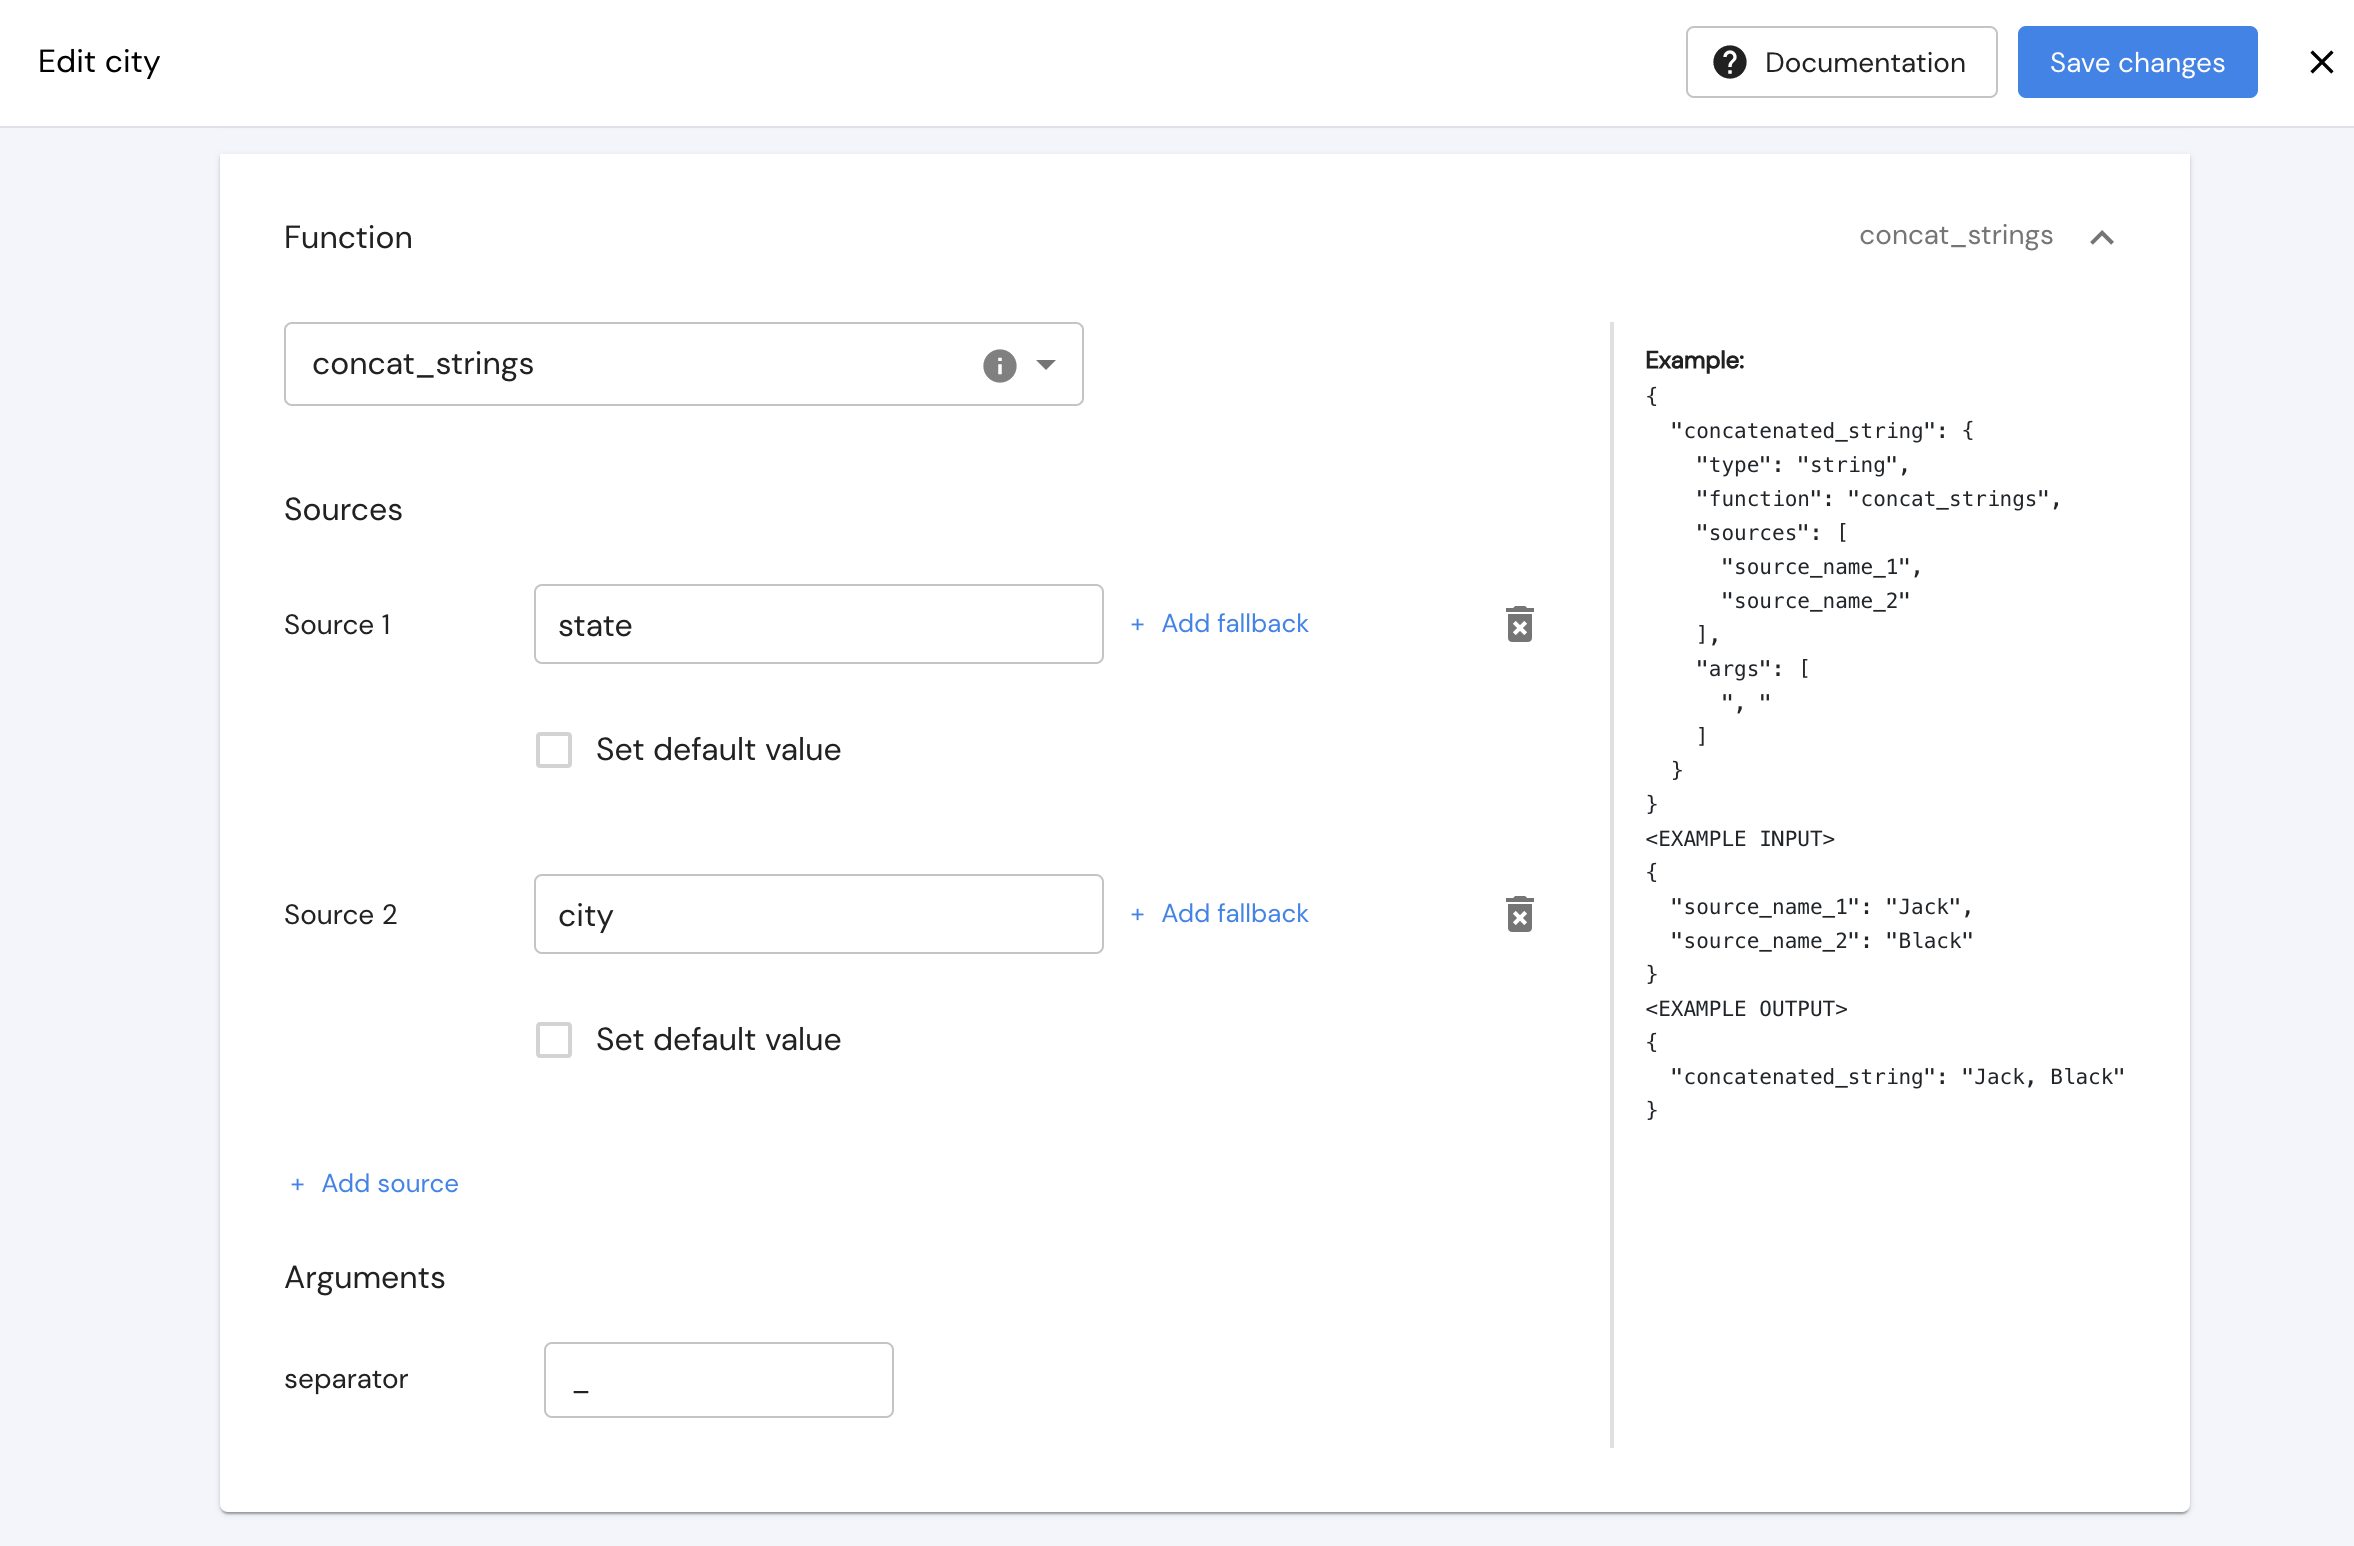
For example, in our data, we are exporting the <city> and the <state> of the loan requester, but some city names exist in a couple of states, so in order to differentiate, we could set the city field to have the state as a prefix.
- On the configurations page, first, click on your context class.
- Under the fields tab, search for the "city" field.
- On the right of the field, click on the "edit field" button.

- Under the "Function" tab, change the "Identity" function to "concat_strings".
- In the first source, add "state". Now click on "add source" and under "source 2" add "city".
- Under "Arguments" add an underscore as a separator.
- Once this is defined we can click “save changes” and it will be saved to the config.

New fields require a backfillOnce a new field is saved in the configuration, it will not be updated in the data, until we “backfill”, which will be done in the next chapter
Another example of a field we can create is the absolute delta between the <label> (whether the loan was paid back or not, 1 or 0), and the <credit_score> our model produced. To do so we will need to take a number of steps.
Step 2. Merge Ground Truth Fields.
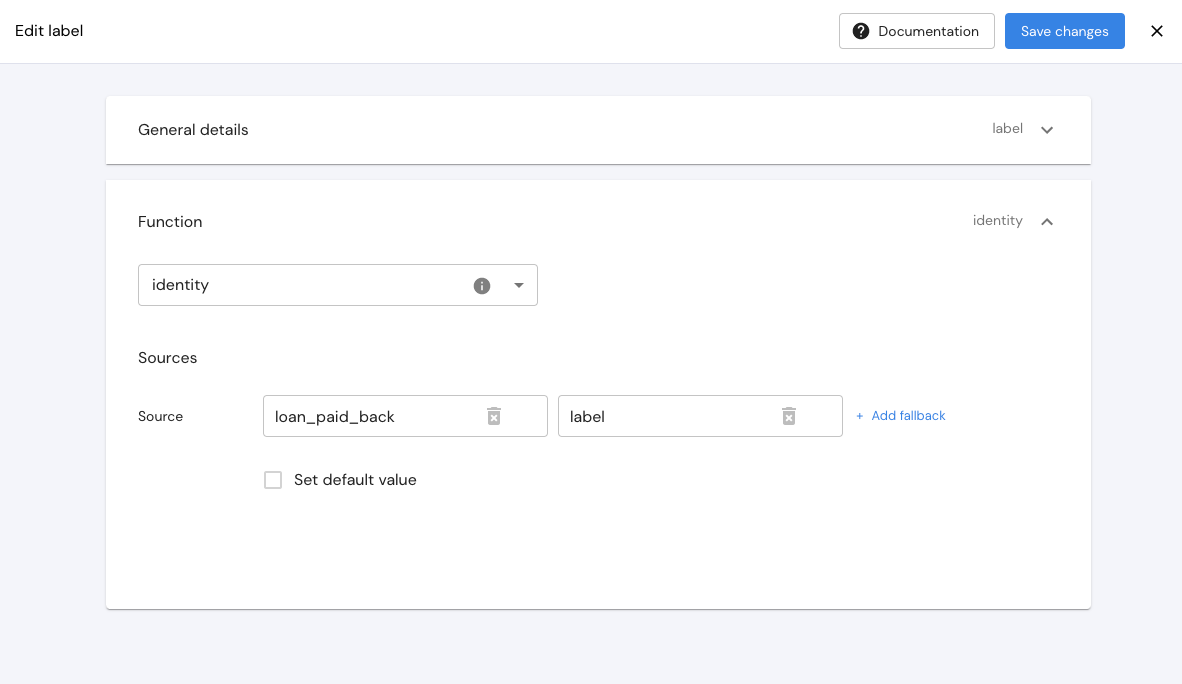
We are sending a <label> field in the "training" and "test" datasets, and for the inference data, we are sending a <loan_paid_back> field in the feedback data. Both fields represent the same "ground truth" data, so we will merge both fields into one "label" field.
- On the configurations page search for the "label" field and click on the edit button on the right.
- Under the function tab, next to the source, click on "Add fallback". This feature allows you to state a number of sources for a field, where Mona will search for a value in the first source, and if not found will search for a value in the second source.
- Under the first source add "loan_paid_back" and under the second source add "label".
- Click on "Save changes".

Step 3. Create a new field - "credit_label_delta".
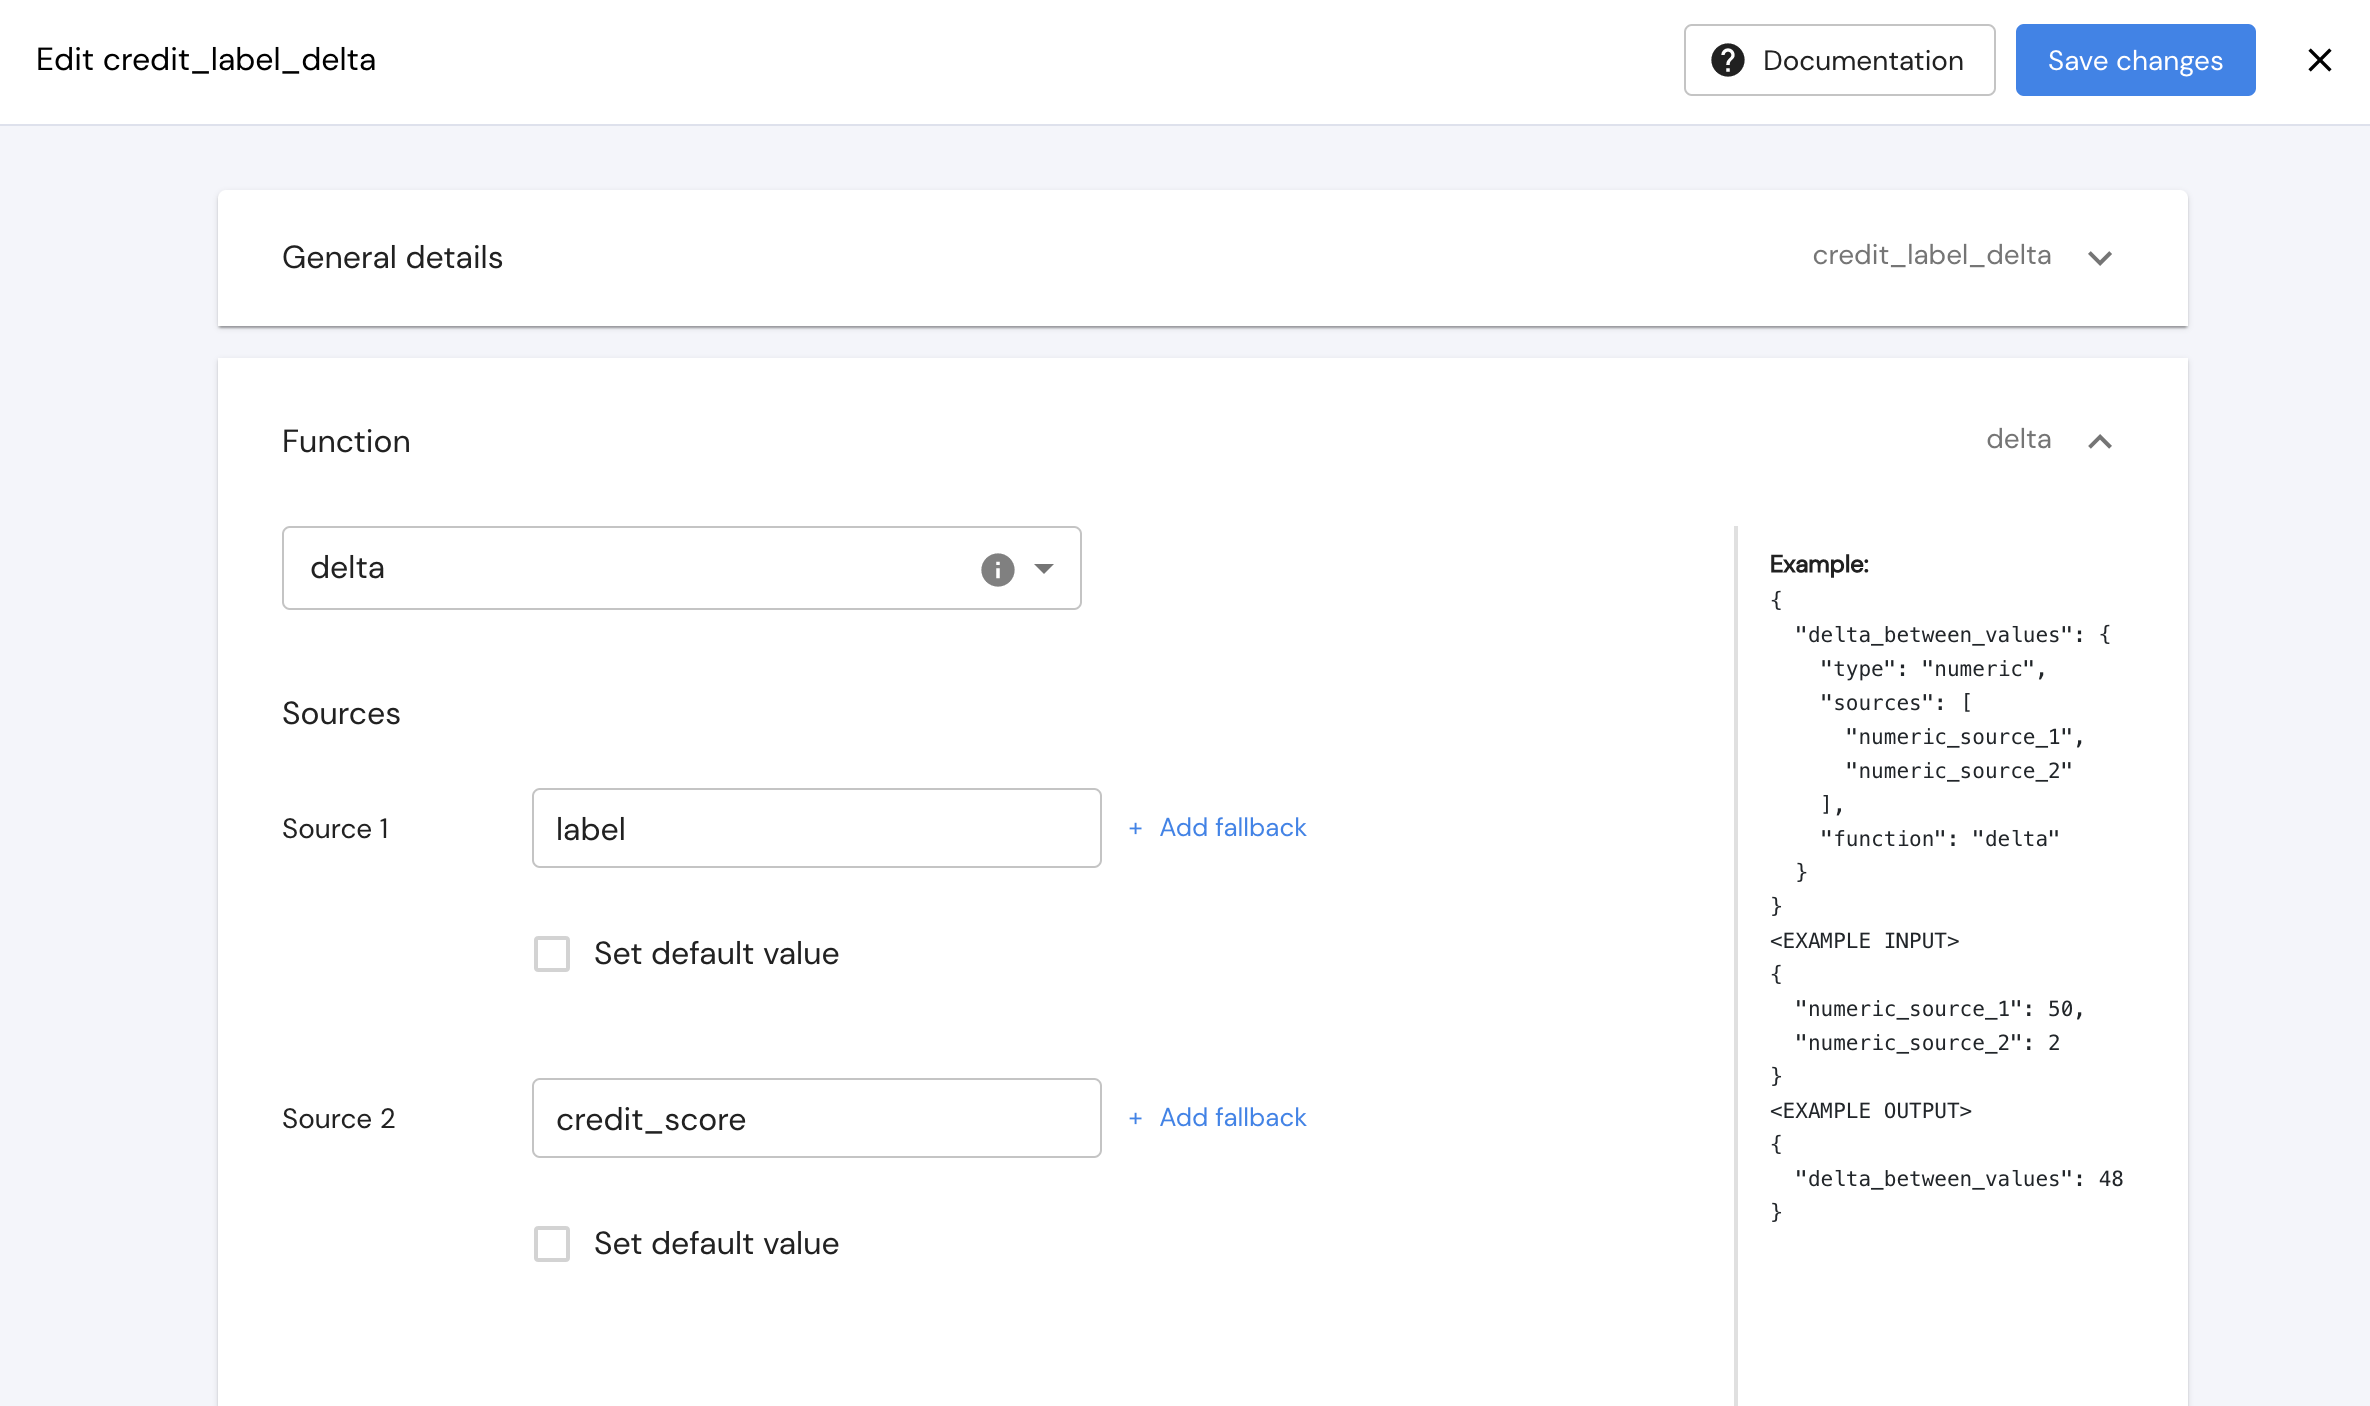
Now let's use this field to create a delta between the label and the credit_score. The bigger this delta is, the worse our model performed.
- Click on “add field”.
- Add a name - we will call this field “credit_label_delta”.
- Under type, we will choose "numeric".
- Under “function” we will choose the “delta” function and add the 2 sources -
<label>and<credit_score>As you can see, on the right, you have an example of how to use each function. - Once this is defined we can click “add field” and it will be saved to the config.

Step 4. Create another field - "credit_label_abs_delta".
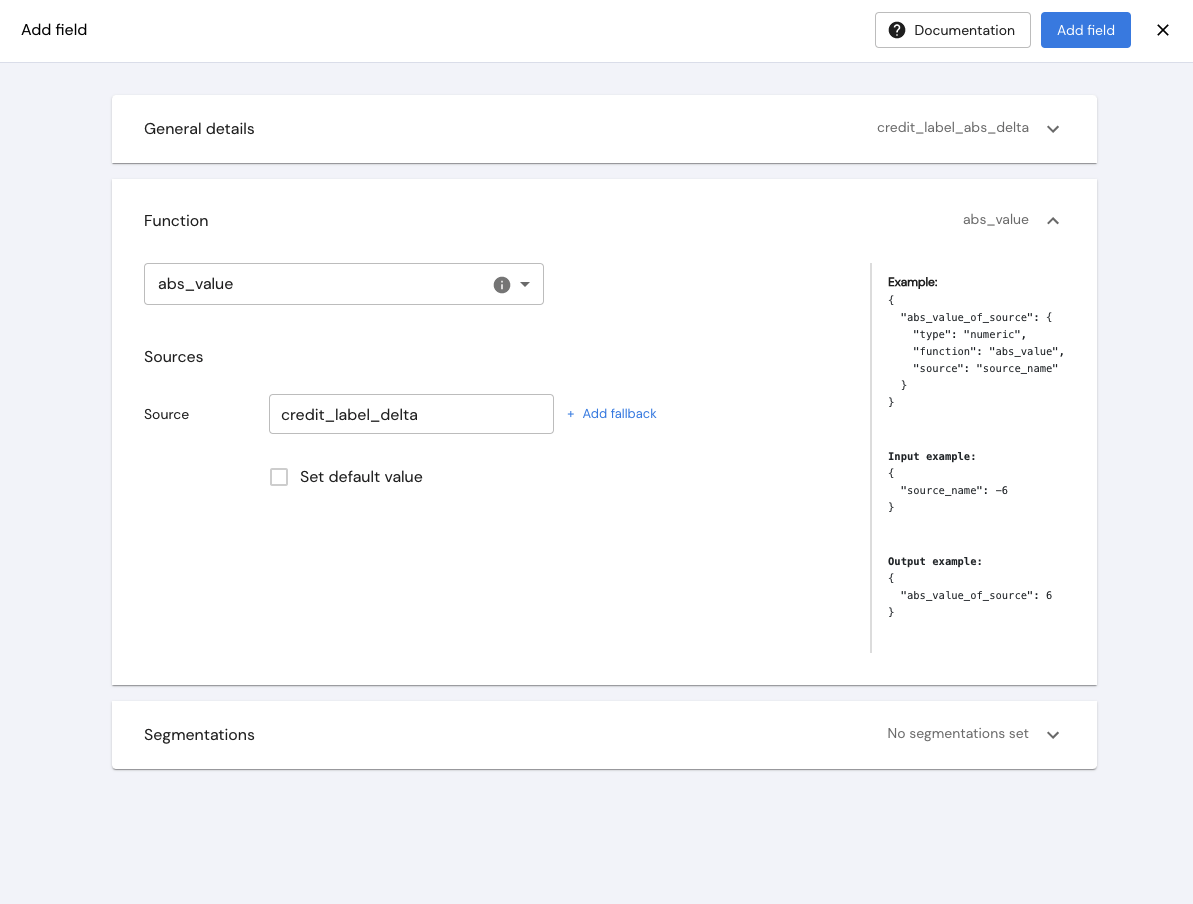
Once we have saved the "credit_label_delta", we will create another new numeric field - "credit_label_abs_delta".
- Click on “add field”.
- Add a name - we will call this field “credit_label_abs_delta”.
- Under the function tab, choose "abs_value"
- Add the "credit_label_delta" field as the source.
- Once this is defined we can click “add field” and it will be saved to the config.

Updated 3 months ago
