Initial Configuration
To help with the initial “fields” configuration, once you have exported data, Mona will automatically build a basic config file for you, but this file might require your review and additions to create a full schema with all the metrics you’d like to track.
Let’s take a look at the automatic configuration Mona created.
Step 1. In the "Getting Started" page, click on “download suggested configuration". If this message banner is missing, try to refresh.

Now a JSON file will be downloaded to your computer with the initial configuration (the uuid at the beginning will be different).
{
  "21234f0c-asf32-4239-b456-3t4e4345319g": {
    "LOAN_APPLICATION_TUTORIAL": {
      "fields": {
        "occupation": {
          "type": "string"
        },
        "city": {
          "type": "string"
        },
        "state": {
          "type": "string"
        },
        "purpose": {
          "type": "string"
        },
        "credit_score": {
          "type": "numeric",
          "segmentations": {
            "original": {
              "default": true,
              "bucket_size": 0.02
            }
          }
        },
        "loan_taken": {
          "type": "boolean"
        },
        "return_until": {
          "type": "numeric",
          "segmentations": {
            "original": {
              "default": true,
              "bucket_size": 1000000
            }
          }
        },
        "offered_amount": {
          "type": "numeric",
          "segmentations": {
            "original": {
              "default": true,
              "bucket_size": 700
            }
          }
        },
        "approved_amount": {
          "type": "numeric",
          "segmentations": {
            "original": {
              "default": true,
              "bucket_size": 700
            }
          }
        },
        "feature_0": {
          "type": "numeric",
          "segmentations": {
            "original": {
              "default": true,
              "bucket_size": 60000
            }
          }
        },
        "feature_1": {
          "type": "numeric",
          "segmentations": {
            "original": {
              "default": true,
              "bucket_size": 0.4
            }
          }
        },
        "feature_2": {
          "type": "numeric",
          "segmentations": {
            "original": {
              "default": true,
              "bucket_size": 30
            }
          }
        },
        "feature_3": {
          "type": "numeric",
          "segmentations": {
            "original": {
              "default": true,
              "bucket_size": 6000
            }
          }
        },
        "feature_4": {
          "type": "numeric",
          "segmentations": {
            "original": {
              "default": true,
              "bucket_size": 0.01
            }
          }
        },
        "feature_5": {
          "type": "numeric",
          "segmentations": {
            "original": {
              "default": true,
              "bucket_size": 0.2
            }
          }
        },
        "feature_6": {
          "type": "numeric",
          "segmentations": {
            "original": {
              "default": true,
              "bucket_size": 20
            }
          }
        },
        "feature_7": {
          "type": "numeric",
          "segmentations": {
            "original": {
              "default": true,
              "bucket_size": 1
            }
          }
        },
        "feature_8": {
          "type": "numeric",
          "segmentations": {
            "original": {
              "default": true,
              "bucket_size": 50
            }
          }
        },
        "feature_9": {
          "type": "numeric",
          "segmentations": {
            "original": {
              "default": true,
              "bucket_size": 20
            }
          }
        },
        "stage": {
          "type": "string"
        },
        "model_version": {
          "type": "string"
        },
        "loan_paid_back": {
          "type": "boolean"
        }
      }
    }
  }
}
As you can see, the top level of the JSON file is your Mona user id. One level beneath this is where you define your context classes, and in each class, you define a “fields” key. We’ll discuss other possible configuration features in the next chapters but for now let’s focus on the fields, which describe the monitoring schema of the context class.
Mona also has a complete GUI (Graphical User Interface) for handling the configuration, and you don’t have to use the JSON file directly after uploading the initial config.
Step 2. Check initial configuration.
Check Field types
Let’s review the fields Mona automatically created, to find out if any changes are necessary. We can see that Mona automatically generated fields for all the keys found in the exported JSON. Considering each of the fields, we first look at the field’s type. Mona supports several field types, the 3 main ones being "string", "numeric" and "boolean".
{
  "purpose": {
    "type": "string"
  }
}
Mona uses best-effort methods to recognize the types for the exported fields, so we recommend making sure no mistakes were made.
Check Field Segmentations
If a field is numeric we should now check the segmentation section.
While segmenting the data according to values of string or boolean fields is trivial, numeric field values can be bucketed in infinite ways. By using “segmentation” objects within numeric field configurations, Mona can be configured to segment the numeric field’s values in several ways, as described in our documentation. If not configured correctly, Mona might separate the field into irrelevant bucket sizes.
In the initial config, you will see that Mona already suggested a segmentation option but you might have different preferences for this.
Logarithmic Scale Segmentation
For example, you might want to segment some fields according to a logarithmic scale. If you choose to do that by using the "should_log" key, Mona will bucket the values based on a base 2 logarithmic scale where the smaller values will be in smaller buckets and larger values will be in larger buckets. The "min_value" and "max_value" params can be used to set the limits of the segmentation. Values below the "min_value" will all be bucketed in a "UNDER_BOUNDS" bucket, and similarly, values over "max_value" will be bucketed in an "OVER_BOUNDS" bucket.
For example:
{
  "feature_9": {
    "type": "numeric",
    "segmentations": {
      "original": {
        "default": true,
        "min_value": 0,
        "max_value": 15000,
        "should_log": true
      }
    }
  }
}
Bucket Size Segmentation
Knowing a rough estimate of the values you are sending for each field, what is the proper size of buckets you wish to create? For example, the credit score field which has values between 0-1 can be divided into buckets of 0.1 each or even 0.05 to get more granularity.
For example:
{
  "credit_score": {
    "type": "numeric",
    "segmentations": {
      "original": {
        "default": true,
        "bucket_size": 0.05
      }
    }
  }
}Segmentation configurations can easily be changed at a later point.
Are all fields now defined correctly? Great! Now let’s upload the initial config to Mona.
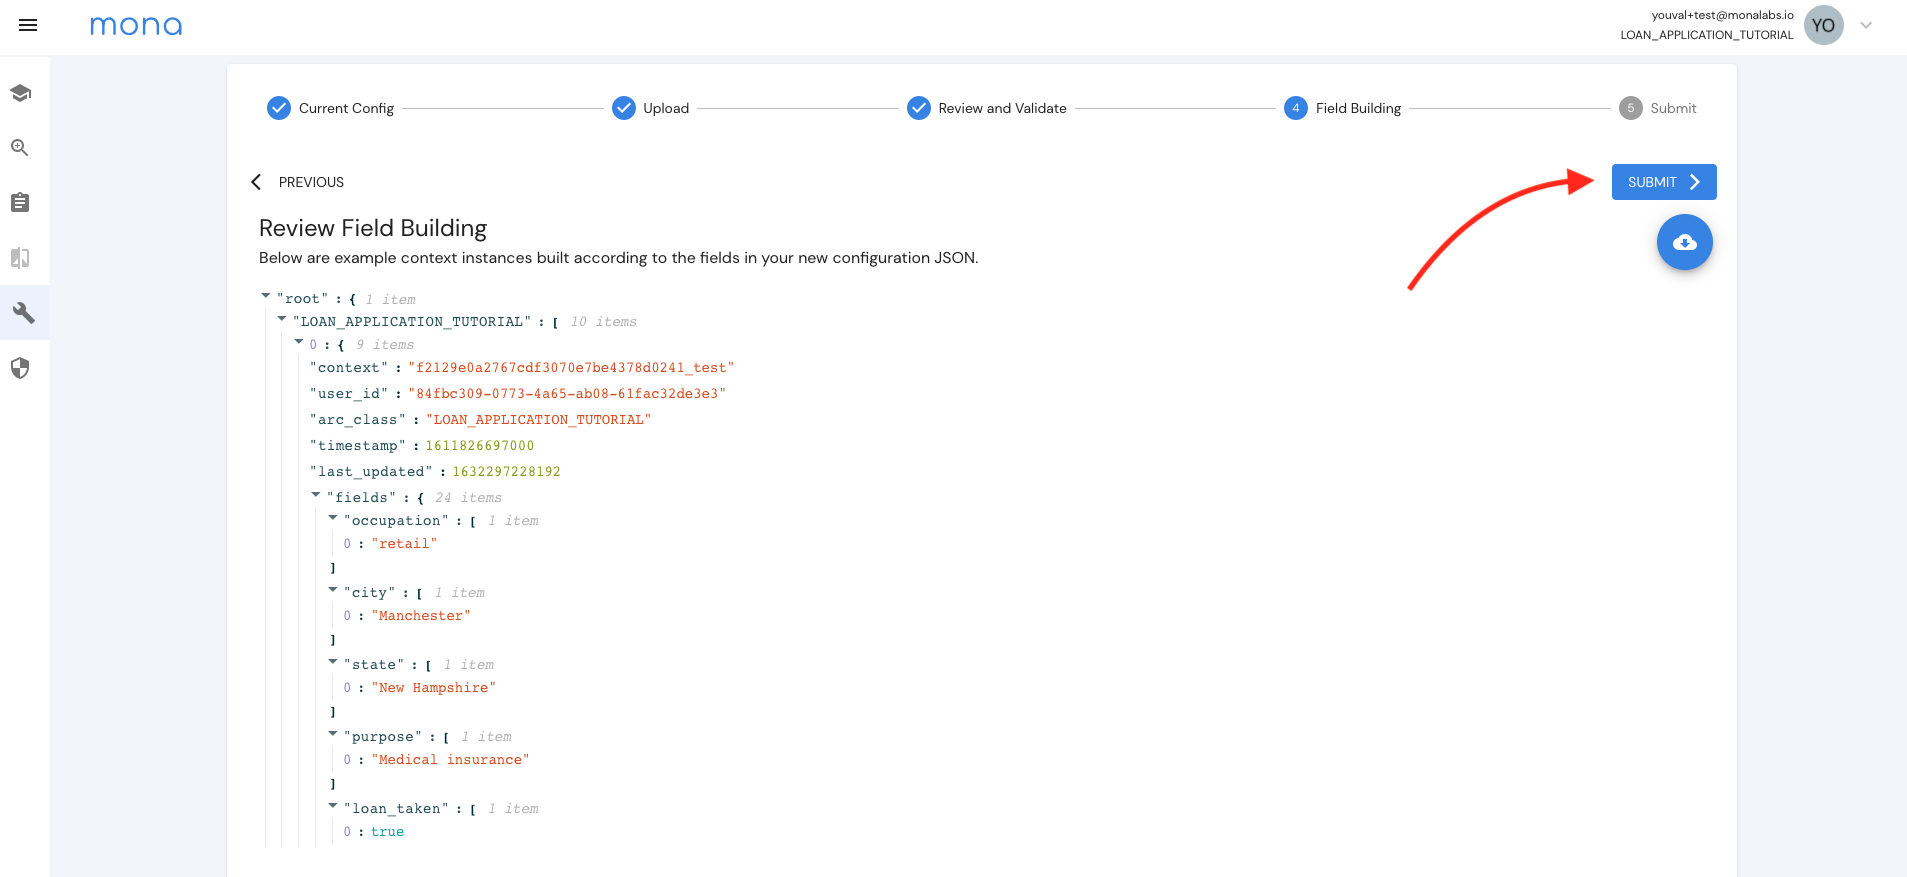
Step 3. In the configuration page, click on “Upload as JSON” and choose your config file.

Now in config comparison, you can check the config again or compare it to a previous version if one exists. In the validation window, you can validate your fields and see example values for them. After you submit the config Mona will start to process your data according to the config file. Once it is done, the investigations page will become available.

In the last step you will be required to add a commit message. Try to add a message that will help you remember what is different about this config file. You will be able to see previous config files and their commit message in the "Config history".
References:\ Numeric Fields Segmentation
Updated 3 months ago
